
《Django》入门 Notes(中)
《Django》入门 Notes(中)
@Seymour0314 来源官方文档https://docs.djangoproject.com/zh-hans/4.2/intro/
本文是Django 后端技术初级入门教程。
编程语言:Python
第 3 部分
本教程从 教程2结束的地方开始。我们将继续开发网络投票应用程序,并将着重于创建公共接口——“视图”。
3.1 概况
-
Django 中的视图的概念是「一类具有相同功能和模板的网页的集合」。
比如,在一个博客应用中,你可能会创建如下几个视图:
- 博客首页——展示最近的几项内容。
- 内容“详情”页——详细展示某项内容。
- 以年为单位的归档页——展示选中的年份里各个月份创建的内容。
- 以月为单位的归档页——展示选中的月份里各天创建的内容。
- 以天为单位的归档页——展示选中天里创建的所有内容。
- 评论处理器——用于响应为一项内容添加评论的操作。
而在我们的投票应用中,我们需要下列几个视图:
- 问题索引页——展示最近的几个投票问题。
- 问题详情页——展示某个投票的问题和不带结果的选项列表。
- 问题结果页——展示某个投票的结果。
- 投票处理器——用于响应用户为某个问题的特定选项投票的操作。
-
在 Django 中,网页和其他内容都是从视图派生而来。
每一个视图表现为一个 Python 函数(或者说方法,如果是在基于类的视图里的话)。
Django 将会根据用户请求的 URL 来选择使用哪个视图(更准确的说,是根据 URL 中域名之后的部分)。
在你上网的过程中,很可能看见过像这样美丽的 URL:
ME2/Sites/dirmod.htm?sid=&type=gen&mod=Core+Pages&gid=A6CD4967199A42D9B65B1B别担心,Django 里的 URL 样式 要比这优雅的多!
-
URL 样式是 URL 的一般形式
例如:
/newsarchive/<year>/<month>/。 -
为了将 URL 和视图关联起来,Django 使用了 ‘URLconfs’ 来配置。
URLconf 将 URL 模式映射到视图。
本教程只会介绍 URLconf 的基础内容,你可以看看 URL调度器 以获取更多内容。
3.2 编写更多视图
-
现在让我们向
polls/views.py里添加更多视图。这些视图有一些不同,因为他们接收参数:
polls/views.py1
2
3
4
5
6
7
8
9
10
11def detail(request, question_id):
return HttpResponse("You're looking at question %s." % question_id)
def results(request, question_id):
response = "You're looking at the results of question %s."
return HttpResponse(response % question_id)
def vote(request, question_id):
return HttpResponse("You're voting on question %s." % question_id) -
把这些新视图添加进
polls.urls模块里,只要添加几个
url()函数调用就行:polls/urls.py1
2
3
4
5
6
7
8
9
10
11
12
13
14from django.urls import path
from . import views
urlpatterns = [
# ex: /polls/
path("", views.index, name="index"),
# ex: /polls/5/
path("<int:question_id>/", views.detail, name="detail"),
# ex: /polls/5/results/
path("<int:question_id>/results/", views.results, name="results"),
# ex: /polls/5/vote/
path("<int:question_id>/vote/", views.vote, name="vote"),
] -
查看效果
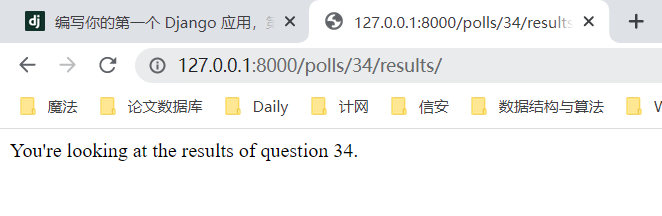
然后看看你的浏览器,如果你转到 “/polls/34/” ,Django 将会运行
detail()方法并且展示你在 URL 里提供的问题 ID。再试试 “/polls/34/vote/” 和 “/polls/34/vote/” ——你将会看到暂时用于占位的结果和投票页。
记得先开服务器运行
py manage.py runserver
-
问题
question_id=34来自<int:question_id>。使用尖括号 “获得” 网址部分后发送给视图函数作为一个关键字参数。
-
字符串的
question_id部分定义了要使用的名字,用来识别相匹配的模式,而
int部分是一种转换形式,用来确定应该匹配网址路径的什么模式。冒号 (
:) 用来分隔转换形式和模式名。
-
3.3 写一个真正有用的视图
每个视图必须要做的只有两件事:
- 返回一个包含被请求页面内容的
HttpResponse对象,- 或者抛出一个异常,比如
Http404。至于你还想干些什么,随便你。
你的视图
可以从数据库里读取记录
可以使用一个模板引擎(比如 Django 自带的,或者其他第三方的)
可以生成一个 PDF 文件
可以输出一个 XML
创建一个 ZIP 文件
你可以做任何你想做的事,使用任何你想用的 Python 库。
-
Django 只要求返回的是一个
HttpResponse,或者抛出一个异常。因为 Django 自带的数据库 API 很方便,我们曾在 教程第 2 部分中学过,所以我们试试在视图里使用它。
-
我们在
index()函数里插入了一些新内容,让它能展示数据库里以发布日期排序的最近 5 个投票问题,以空格分割:
polls/views.py1
2
3
4
5
6
7
8
9
10
11
12from django.http import HttpResponse
from .models import Question
def index(request):
latest_question_list = Question.objects.order_by("-pub_date")[:5]
output = ", ".join([q.question_text for q in latest_question_list])
return HttpResponse(output)
# Leave the rest of the views (detail, results, vote) unchanged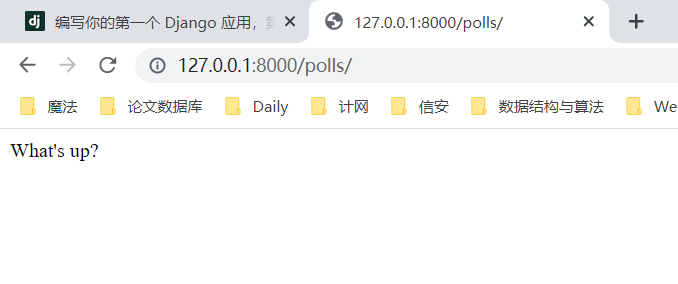
这里有个问题:页面的设计写死在视图函数的代码里的。
如果你想改变页面的样子,你需要编辑 Python 代码。
所以让我们使用 Django 的模板系统,只要创建一个视图,就可以将页面的设计从代码中分离出来。
-
首先,在你的
polls目录里创建一个templates目录。Django 将会在这个目录里查找模板文件。
-
你项目的
TEMPLATES配置项描述了 Django 如何载入和渲染模板。 -
默认的设置文件设置了
DjangoTemplates后端,并将APP_DIRS设置成了 True。这一选项将会让
DjangoTemplates在每个INSTALLED_APPS文件夹中寻找 “templates” 子目录。这就是为什么尽管我们没有像在第二部分中那样修改 DIRS 设置,Django 也能正确找到 polls 的模板位置的原因。
在你刚刚创建的
templates目录里,再创建一个目录polls,然后在其中新建一个文件index.html。polls/templates/polls/index.html换句话说,你的模板文件的路径应该是
polls/templates/polls/index.html。因为
app_directories模板加载器是通过上述描述的方法运行的,所以 Django 可以引用到
polls/index.html这一模板了。-
模板命名空间
虽然我们现在可以将模板文件直接放在
polls/templates文件夹中(而不是再建立一个polls子文件夹),但是这样做不太好。Django 将会选择第一个匹配的模板文件,如果你有一个模板文件正好和另一个应用中的某个模板文件重名,Django 没有办法 区分 它们。
我们需要帮助 Django 选择正确的模板,最好的方法就是把他们放入各自的 命名空间 中,也就是把这些模板放入一个和 自身 应用重名的子文件夹里。
1
2
3
4
5
6
7
8
9{% if latest_question_list %}
<ul>
{% for question in latest_question_list %}
<li><a href="/polls/{{ question.id }}/">{{ question.question_text }}</a></li>
{% endfor %}
</ul>
{% else %}
<p>No polls are available.</p>
{% endif %}-
备注
为了让教程看起来不那么长,所有的模板文件都只写出了核心代码。
在你自己创建的项目中,你应该使用 完整的 HTML 文档 。
本次的完整HTML:
1
2
3
4
5
6
7
8
9
10
11
12
13
14
15
16
17
18
19
<html>
<head>
<meta charset="utf-8">
<title>POLLS</title>
</head>
<body>
<h1>Polls:</h1>
{% if latest_question_list %}
<ul>
{% for question in latest_question_list %}
<li><a href="/polls/{{ question.id }}/">{{ question.question_text }}</a></li>
{% endfor %}
</ul>
{% else %}
<p>No polls are available.</p>
{% endif %}
</body>
</html>
-
-
然后,让我们更新一下
polls/views.py里的index视图来使用模板:polls/views.py1
2
3
4
5
6
7
8
9
10
11
12
13from django.http import HttpResponse
from django.template import loader
from .models import Question
def index(request):
latest_question_list = Question.objects.order_by("-pub_date")[:5]
template = loader.get_template("polls/index.html")
context = {
"latest_question_list": latest_question_list,
}
return HttpResponse(template.render(context, request))-
上述代码的作用是,载入
polls/index.html模板文件,并且向它传递一个上下文(context)。这个上下文是一个字典,它将模板内的变量映射为 Python 对象。 -
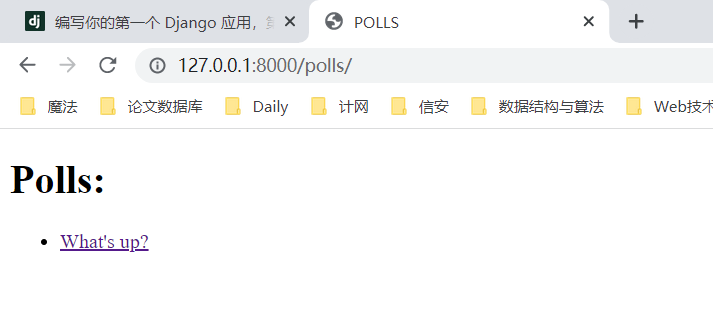
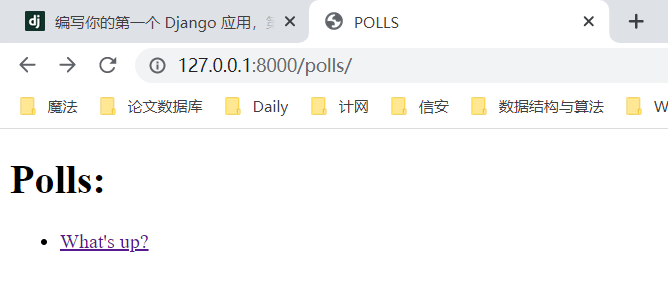
用你的浏览器访问 “/polls/” ,你将会看见一个无序列表,列出了我们在 教程第 2 部分 中添加的 “What’s up” 投票问题,链接指向这个投票的详情页。
-
一个快捷函数: render()
-
「载入模板,填充上下文,再返回由它生成的
HttpResponse对象」是一个非常常用的操作流程。
-
于是 Django 提供了一个快捷函数,
我们用它来重写
index()视图:polls/views.py1
2
3
4
5
6
7
8
9from django.shortcuts import render
from .models import Question
def index(request):
latest_question_list = Question.objects.order_by("-pub_date")[:5]
context = {"latest_question_list": latest_question_list}
return render(request, "polls/index.html", context)注意到,我们不再需要导入
loader和HttpResponse。不过如果你还有其他函数(比如说
detail,results, 和vote)需要用到它的话,就需要保持
HttpResponse的导入。
3.4 抛出 404 错误
-
现在,我们来处理投票详情视图——它会显示指定投票的问题标题。下面是这个视图的代码:
polls/views.py1
2
3
4
5
6
7
8
9
10
11
12
13from django.http import Http404
from django.shortcuts import render
from .models import Question
# ...
def detail(request, question_id):
try:
question = Question.objects.get(pk=question_id)
except Question.DoesNotExist:
raise Http404("Question does not exist")
return render(request, "polls/detail.html", {"question": question}) -
这里有个新原则。
如果指定问题 ID 所对应的问题不存在,这个视图就会抛出一个
Http404异常。我们稍后再讨论你需要在
polls/detail.html里输入什么,但是如果你想试试上面这段代码是否正常工作的话,
你可以暂时把下面这段输进去:
polls/templates/polls/details.html1
2
3
4
5
6
7
8
9
10
11
<html>
<head>
<meta charset="utf-8">
<title>POLLS</title>
</head>
<body>
<h1>Polls:</h1>
{{ question }}
</body>
</html>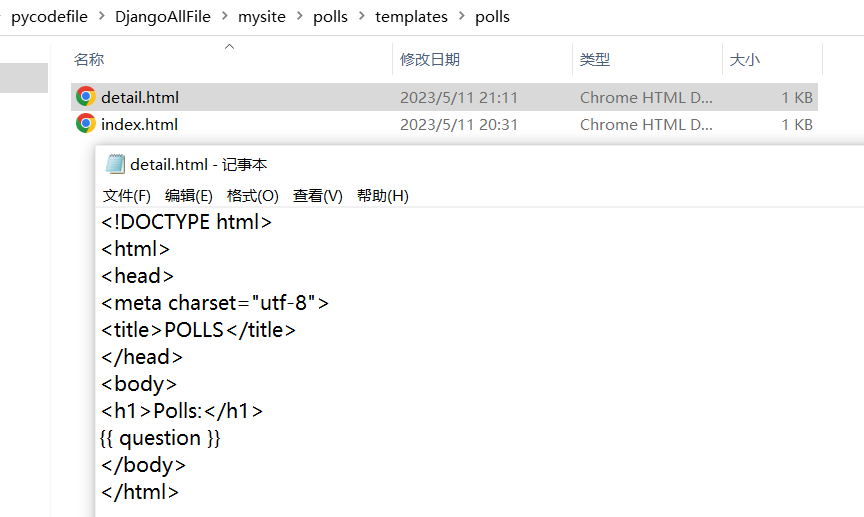
这样你就能测试了。
比如,测试
127.0.0.1:8000/polls/34/details/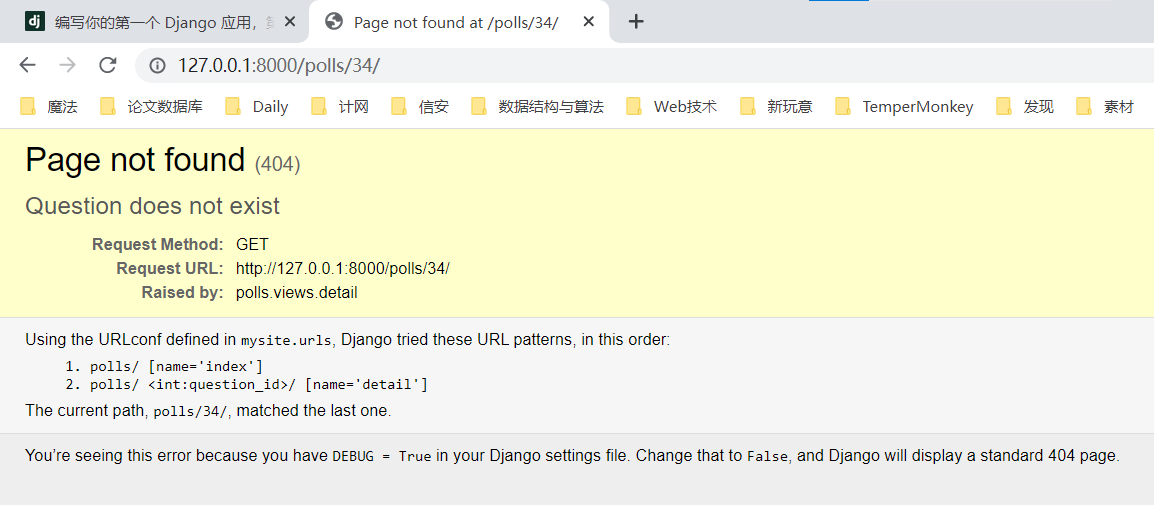
一个快捷函数: get_object_or_404()
-
尝试用
get()函数获取一个对象,如果不存在就抛出Http404错误也是一个普遍的流程。Django 也提供了一个快捷函数,下面是修改后的详情
detail()视图代码:polls/views.py1
2
3
4
5
6
7
8
9from django.shortcuts import get_object_or_404, render
from .models import Question
# ...
def detail(request, question_id):
question = get_object_or_404(Question, pk=question_id)
return render(request, "polls/detail.html", {"question": question})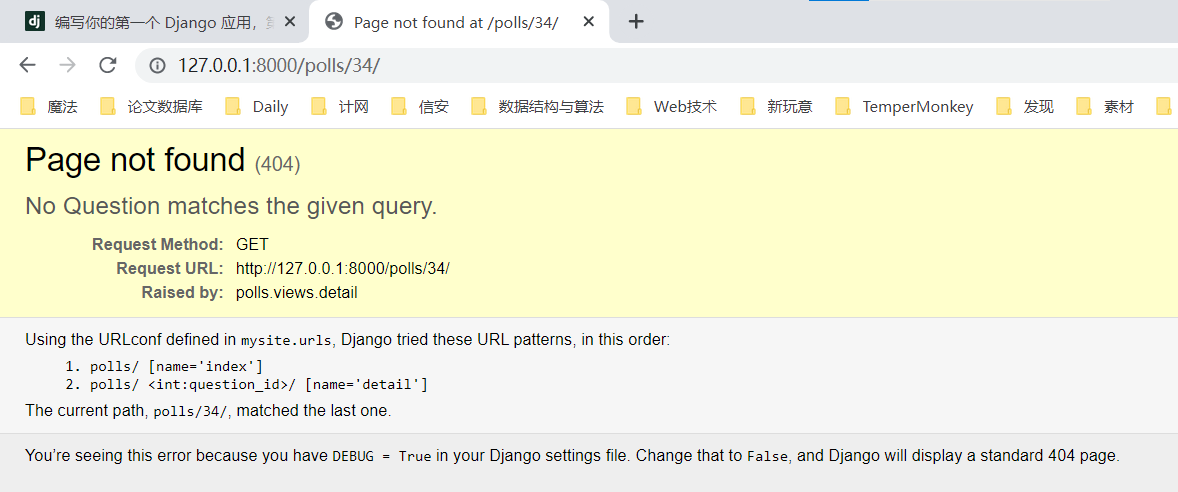
设计哲学
-
为什么我们使用辅助函数
get_object_or_404()而不是自己捕获ObjectDoesNotExist异常呢?还有,为什么模型 API 不直接抛出
ObjectDoesNotExist而是抛出Http404呢? -
因为这样做会增加模型层和视图层的耦合性。
指导 Django 设计的最重要的思想之一就是要保证松散耦合。
一些受控的耦合将会被包含在
django.shortcuts模块中。
-
-
也有
get_list_or_404()函数,工作原理和
get_object_or_404()一样,除了get()函数被换成了filter()函数。如果列表为空的话会抛出
Http404异常。
3.5 使用模板系统
-
回过头去看看我们的
detail()视图。它向模板传递了上下文变量question。下面是
polls/detail.html模板里正式的代码:1
2
3
4
5
6<h1>{{ question.question_text }}</h1>
<ul>
{% for choice in question.choice_set.all %}
<li>{{ choice.choice_text }}</li>
{% endfor %}
</ul> -
模板系统统一使用点符号来访问变量的属性。
在示例
{{ question.question_text }}中,-
首先 Django 尝试对
question对象使用字典查找(也就是使用 obj.get(str) 操作), -
如果失败了就尝试属性查找(也就是 obj.str 操作),结果是成功了。
-
如果这一操作也失败的话,将会尝试列表查找(也就是 obj[int] 操作)。
-
-
在
{% for %}循环中发生的函数调用:question.choice_set.all被解释为 Python 代码question.choice_set.all(),将会返回一个可迭代的
Choice对象,这一对象可以在{% for %}标签内部使用。查看 模板指南 可以了解关于模板的更多信息。
3.6 去除模板中的硬编码 URL
-
还记得吗,我们在
polls/index.html里编写投票链接时,链接是硬编码的:1
<li><a href="/polls/{{ question.id }}/">{{ question.question_text }}</a></li>
问题在于,硬编码和强耦合的链接,对于一个包含很多应用的项目来说,修改起来是十分困难的。
-
然而,因为你在
polls.urls的url()函数中通过 name 参数为 URL 定义了名字,你可以使用
{% url %}标签代替它:1
<li><a href="{% url 'detail' question.id %}">{{ question.question_text }}</a></li>
这个标签的工作方式是在
polls.urls模块的 URL 定义中寻具有指定名字的条目。你可以回忆一下,具有名字 ‘detail’ 的 URL 是在如下语句中定义的:
1
2
3
4...
# the 'name' value as called by the {% url %} template tag
path("<int:question_id>/", views.detail, name="detail"),
...如果你想改变投票详情视图的 URL,比如想改成
polls/specifics/12/,你不用在模板里修改任何东西(包括其它模板),
只要在
polls/urls.py里稍微修改一下就行:1
2
3
4...
# added the word 'specifics'
path("specifics/<int:question_id>/", views.detail, name="detail"),
...
3.7 为 URL 名称添加命名空间
-
教程项目只有一个应用,
polls。在一个真实的 Django 项目中,可能会有五个,十个,二十个,甚至更多应用。Django 如何分辨重名的 URL 呢?举个例子,
polls应用有detail视图,可能另一个博客应用也有同名的视图。Django 如何知道
{% url %}标签到底对应哪一个应用的 URL 呢? -
答案是:在根 URLconf 中添加命名空间。在
polls/urls.py文件中稍作修改,加上app_name设置命名空间:polls/urls.py1
2
3
4
5
6
7
8
9
10
11from django.urls import path
from . import views
app_name = "polls"
urlpatterns = [
path("", views.index, name="index"),
path("<int:question_id>/", views.detail, name="detail"),
path("<int:question_id>/results/", views.results, name="results"),
path("<int:question_id>/vote/", views.vote, name="vote"),
] -
现在,编辑
polls/index.html文件,从:polls/templates/polls/index.html1
<li><a href="{% url 'detail' question.id %}">{{ question.question_text }}</a></li>
修改为指向具有命名空间的详细视图:
polls/templates/polls/index.html1
<li><a href="{% url 'polls:detail' question.id %}">{{ question.question_text }}</a></li>
当你对你写的视图感到满意后,请阅读 教程的第 4 部分了解基础的表单处理和通用视图。
第 4 部分
本教程从 教程第 3 部分 结束的地方开始。我们将继续网络投票的应用,并将重点放在表单处理和精简我们的代码上。
4.1 编写一个简单的表单
-
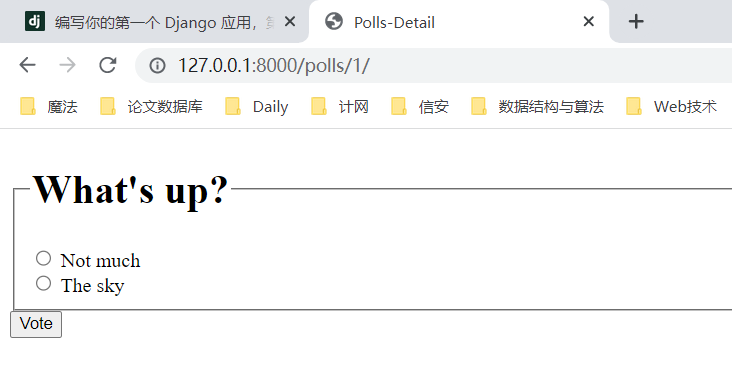
让我们更新一下在上一个教程中编写的投票详细页面的模板 (“polls/detail.html”) ,
让它包含一个 HTML
<form>元素:polls/templates/polls/detail.html1
2
3
4
5
6
7
8
9
10
11
12<form action="{% url 'polls:vote' question.id %}" method="post">
{% csrf_token %}
<fieldset>
<legend><h1>{{ question.question_text }}</h1></legend>
{% if error_message %}<p><strong>{{ error_message }}</strong></p>{% endif %}
{% for choice in question.choice_set.all %}
<input type="radio" name="choice" id="choice{{ forloop.counter }}" value="{{ choice.id }}">
<label for="choice{{ forloop.counter }}">{{ choice.choice_text }}</label><br>
{% endfor %}
</fieldset>
<input type="submit" value="Vote">
</form>简要说明:
-
上面的模板在 Question 的每个 Choice 前添加一个单选按钮。
每个单选按钮的
value属性是对应的各个 Choice 的 ID。每个单选按钮的name是"choice"。这意味着,当有人选择一个单选按钮并提交表单提交时,它将发送一个 POST 数据choice=#,其中# 为选择的 Choice 的 ID。这是 HTML 表单的基本概念。 -
我们将表单的
action设置为{% url 'polls:vote' question.id %},并设置method="post"。使用
method="post"(而不是method="get")是非常重要的,因为提交这个表单的行为将改变服务器端的数据。当你创建一个改变服务器端数据的表单时,使用method="post"。这不是 Django 的特定技巧;这是优秀的网站开发技巧。
-
forloop.counter指示for标签已经循环多少次。 -
由于我们创建一个 POST 表单(它具有修改数据的作用),所以我们需要小心跨站点请求伪造。
谢天谢地,你不必太过担心,因为 Django 自带了一个非常有用的防御系统。
简而言之,所有针对内部 URL 的 POST 表单都应该使用
{% csrf_token %}模板标签。
-
-
现在,让我们来创建一个 Django 视图来处理提交的数据。
记住,在 教程第 3 部分中,我们为投票应用创建了一个 URLconf ,包含这一行:
polls/urls.py1
path("<int:question_id>/vote/", views.vote, name="vote"),
-
我们还创建了一个
vote()函数的虚拟实现。让我们来创建一个真实的版本。 将下面的代码添加到
polls/views.py:polls/views.py1
2
3
4
5
6
7
8
9
10
11
12
13
14
15
16
17
18
19
20
21
22
23
24
25
26
27
28
29from django.shortcuts import get_object_or_404, render
from django.http import HttpResponse, HttpResponseRedirect
from django.urls import reverse
from .models import Choice, Question
# ...
def vote(request, question_id):
question = get_object_or_404(Question, pk=question_id)
try:
selected_choice = question.choice_set.get(pk=request.POST["choice"])
except (KeyError, Choice.DoesNotExist):
# Redisplay the question voting form.
return render(
request,
"polls/detail.html",
{
"question": question,
"error_message": "You didn't select a choice.",
},
)
else:
selected_choice.votes += 1
selected_choice.save()
# Always return an HttpResponseRedirect after successfully dealing
# with POST data. This prevents data from being posted twice if a
# user hits the Back button.
return HttpResponseRedirect(reverse("polls:results", args=(question.id,)))以上代码中有些内容还未在本教程中提到过:
-
request.POST是一个类字典对象,让你可以通过关键字的名字获取提交的数据。这个例子中,
request.POST['choice']以字符串形式返回选择的 Choice 的 ID。request.POST的值永远是字符串。注意,Django 还以同样的方式提供
request.GET用于访问 GET 数据但我们在代码中显式地使用
request.POST,以保证数据只能通过 POST 调用改动。 -
如果在
request.POST['choice']数据中没有提供choice, POST 将引发一个KeyError。上面的代码检查
KeyError,如果没有给出choice将重新显示 Question 表单和一个错误信息。 -
在增加 Choice 的得票数之后,代码返回一个
HttpResponseRedirect而不是常用的HttpResponse。HttpResponseRedirect只接收一个参数:用户将要被重定向的 URL。(请继续看下去,我们将会解释如何构造这个例子中的 URL)
正如上面的 Python 注释指出的,在成功处理 POST 数据后,你应该总是返回一个
HttpResponseRedirect。这不是 Django 的特殊要求,这是那些优秀网站在开发实践中形成的共识。
-
在这个例子中,我们在
HttpResponseRedirect的构造函数中使用reverse()函数。这个函数避免了我们在视图函数中硬编码 URL。它需要我们给出我们想要跳转的视图的名字和该视图所对应的 URL 模式中需要给该视图提供的参数。
在本例中,使用在 教程第 3 部分中设定的 URLconf,
reverse()调用将返回一个这样的字符串:1
"/polls/3/results/"
其中
3是question.id的值。重定向的 URL 将调用'results'视图来显示最终的页面。正如在 教程第 3 部分 中提到的,
HttpRequest是一个HttpRequest对象。更多关于
HttpRequest对象的内容,请参见 请求和响应的文档 。
-
-
当有人对 Question 进行投票后,
vote()视图将请求重定向到 Question 的结果界面。让我们来编写这个视图:
polls/views.py1
2
3
4
5
6from django.shortcuts import get_object_or_404, render
def results(request, question_id):
question = get_object_or_404(Question, pk=question_id)
return render(request, "polls/results.html", {"question": question})这和 教程第 3 部分 中的
detail()视图几乎一模一样。唯一的不同是模板的名字。 我们将在稍后解决这个冗余问题。 -
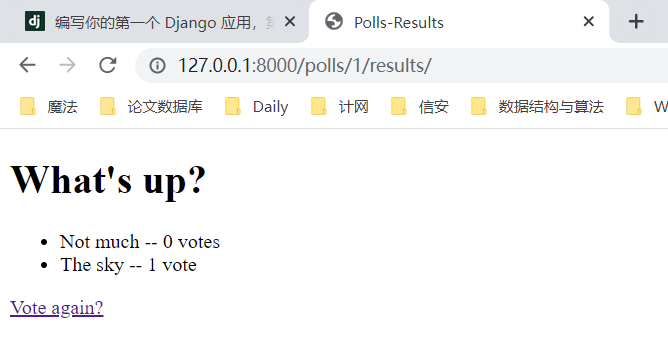
现在,创建一个
polls/results.html模板:polls/templates/polls/results.html1
2
3
4
5
6
7
8
9<h1>{{ question.question_text }}</h1>
<ul>
{% for choice in question.choice_set.all %}
<li>{{ choice.choice_text }} -- {{ choice.votes }} vote{{ choice.votes|pluralize }}</li>
{% endfor %}
</ul>
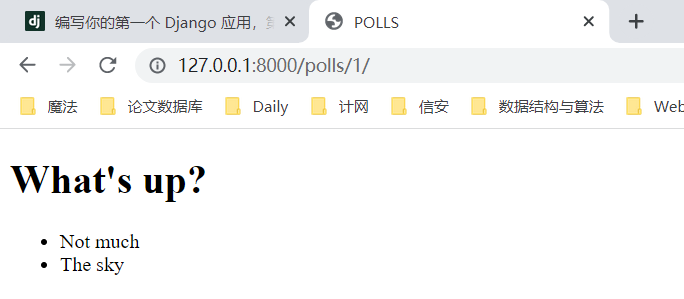
<a href="{% url 'polls:detail' question.id %}">Vote again?</a>现在,在你的浏览器中访问
/polls/1/然后为 Question 投票。你应该看到一个投票结果页面,并且在你每次投票之后都会更新。
如果你提交时没有选择任何 Choice,你应该看到错误信息。

-
备注
我们的
vote()视图代码有一个小问题。代码首先从数据库中获取了
selected_choice对象,接着计算vote的新值,最后把值存回数据库。如果网站有两个方可同时投票在 同一时间 ,可能会导致问题。同样的值,42,会被
votes返回。然后,对于两个用户,新值43计算完毕,并被保存,但是期望值是44。这个问题被称为 竞争条件 。如果你对此有兴趣,你可以阅读 使用 F() 避免竞争条件 来学习如何解决这个问题。
-
4.2 使用通用视图:代码还是少点好
-
detail()(在 教程第 3 部分 中)和results()视图都很精简并且,像上面提到的那样,存在冗余问题。用来显示一个投票列表的
index()视图(也在 教程第 3 部分中)和它们类似。 -
这些视图反映基本的网络开发中的一个常见情况:
根据 URL 中的参数从数据库中获取数据、载入模板文件然后返回渲染后的模板。
-
由于这种情况特别常见,Django 提供一种快捷方式,叫做 “通用视图” 系统。
通用视图将常见的模式抽象化,可以使你在编写应用时甚至不需要编写Python代码。
让我们将我们的投票应用转换成使用通用视图系统,这样我们可以删除许多我们的代码。我们仅仅需要做以下几步来完成转换,我们将:
- 转换 URLconf。
- 删除一些旧的、不再需要的视图。
- 基于 Django 的通用视图引入新的视图。
请继续阅读来了解详细信息。
为什么要重构代码?
一般来说,当编写一个 Django 应用时,你应该先评估一下通用视图是否可以解决你的问题,你应该在一开始使用它,而不是进行到一半时重构代码。本教程目前为止是有意将重点放在以“艰难的方式”编写视图,这是为将重点放在核心概念上。
就像在使用计算器之前你需要掌握基础数学一样。
4.3 改良 URLconf
-
首先,打开
polls/urls.py这个 URLconf 并将它修改成:polls/urls.py1
2
3
4
5
6
7
8
9
10
11from django.urls import path
from . import views
app_name = "polls"
urlpatterns = [
path("", views.IndexView.as_view(), name="index"),
path("<int:pk>/", views.DetailView.as_view(), name="detail"),
path("<int:pk>/results/", views.ResultsView.as_view(), name="results"),
path("<int:question_id>/vote/", views.vote, name="vote"),
]注意,第二个和第三个匹配准则中,路径字符串中匹配模式的名称已经由
<question_id>改为<pk>。
4.4 改良视图
-
下一步,我们将删除旧的
index,detail, 和results视图,并用 Django 的通用视图代替。打开
polls/views.py文件,原来是:
1
2
3
4
5
6
7
8
9
10
11
12
13
14
15
16
17
18
19
20
21
22
23
24
25
26
27
28
29
30
31
32
33
34
35
36
37
38
39
40
41
42
43
44
45
46
47# Create your views here.
from django.shortcuts import get_object_or_404, render
from django.http import HttpResponse, HttpResponseRedirect
from django.urls import reverse
from .models import Choice, Question
def index(request):
latest_question_list = Question.objects.order_by("-pub_date")[:5]
context = {"latest_question_list": latest_question_list}
return render(request, "polls/index.html", context)
def detail(request, question_id):
question = get_object_or_404(Question, pk=question_id)
return render(request, "polls/detail.html", {"question": question})
def results(request, question_id):
question = get_object_or_404(Question, pk=question_id)
return render(request, "polls/results.html", {"question": question})
def vote(request, question_id):
question = get_object_or_404(Question, pk=question_id)
try:
selected_choice = question.choice_set.get(pk=request.POST["choice"])
except (KeyError, Choice.DoesNotExist):
# Redisplay the question voting form.
return render(
request,
"polls/detail.html",
{
"question": question,
"error_message": "You didn't select a choice.",
},
)
else:
selected_choice.votes += 1
selected_choice.save()
# Always return an HttpResponseRedirect after successfully dealing
# with POST data. This prevents data from being posted twice if a
# user hits the Back button.
return HttpResponseRedirect(reverse("polls:results", args=(question.id,)))并将它修改成:
polls/views.py1
2
3
4
5
6
7
8
9
10
11
12
13
14
15
16
17
18
19
20
21
22
23
24
25
26
27
28
29
30
31
32
33
34
35
36
37
38
39
40
41
42
43
44
45
46
47
48
49
50# Create your views here.
from django.http import HttpResponseRedirect
from django.shortcuts import get_object_or_404, render
from django.urls import reverse
from django.views import generic
from .models import Choice, Question
class IndexView(generic.ListView):
template_name = "polls/index.html"
context_object_name = "latest_question_list"
def get_queryset(self):
"""Return the last five published questions."""
return Question.objects.order_by("-pub_date")[:5]
class DetailView(generic.DetailView):
model = Question
template_name = "polls/detail.html"
class ResultsView(generic.DetailView):
model = Question
template_name = "polls/results.html"
def vote(request, question_id):
question = get_object_or_404(Question, pk=question_id)
try:
selected_choice = question.choice_set.get(pk=request.POST["choice"])
except (KeyError, Choice.DoesNotExist):
# Redisplay the question voting form.
return render(
request,
"polls/detail.html",
{
"question": question,
"error_message": "You didn't select a choice.",
},
)
else:
selected_choice.votes += 1
selected_choice.save()
# Always return an HttpResponseRedirect after successfully dealing
# with POST data. This prevents data from being posted twice if a
# user hits the Back button.
return HttpResponseRedirect(reverse("polls:results", args=(question.id,)))我们在这里使用两个通用视图:
ListView和DetailView。这两个视图分别抽象“显示一个对象列表”和“显示一个特定类型对象的详细信息页面”这两种概念。
- 每个通用视图需要知道它将作用于哪个模型。 这由
model属性提供。 DetailView期望从 URL 中捕获名为"pk"的主键值,所以我们为通用视图把question_id改成pk。
默认情况下,通用视图
DetailView使用一个叫做<app name>/<model name>_detail.html的模板。在我们的例子中,它将使用
"polls/question_detail.html"模板。-
template_name属性是用来告诉 Django 使用一个指定的模板名字,而不是自动生成的默认名字。我们也为
results列表视图指定了template_name—— 这确保 results 视图和 detail 视图在渲染时具有不同的外观,即使它们在后台都是同一个DetailView。
类似地,
ListView使用一个叫做<app name>/<model name>_list.html的默认模板;- 我们使用
template_name来告诉ListView使用我们创建的已经存在的"polls/index.html"模板。
- 每个通用视图需要知道它将作用于哪个模型。 这由
-
在之前的教程中,提供模板文件时都带有一个包含
question和latest_question_list变量的 context。对于
DetailView,question变量会自动提供—— 因为我们使用 Django 的模型(Question), Django 能够为 context 变量决定一个合适的名字。然而对于 ListView, 自动生成的 context 变量是
question_list。为了覆盖这个行为,我们提供context_object_name属性,表示我们想使用latest_question_list。作为一种替换方案,你可以改变你的模板来匹配新的 context 变量 —— 这是一种更便捷的方法,告诉 Django 使用你想使用的变量名。
-
启动服务器,使用一下基于通用视图的新投票应用。
效果与前面一样。
更多关于通用视图的详细信息,请查看 通用视图的文档
当你对你所写的表单和通用视图感到满意后,请阅读 教程的第 5 部分 来了解如何测试我们的投票应用。
第 5 部分
本教程从 教程第 4 部分结束的地方开始。我们已经建立了一个网络投票应用程序,现在我们将为它创建一些自动化测试。
5.1 自动化测试简介
自动化测试是什么?
-
测试代码,是用来检查你的代码能否正常运行的程序。
-
测试在不同的层次中都存在。有些测试只关注某个很小的细节(某个模型的某个方法的返回值是否满足预期?),而另一些测试可能检查对某个软件的一系列操作(某一用户输入序列是否造成了预期的结果?)。其实这和我们在 教程第 2 部分,里做的并没有什么不同,我们使用
shell来测试某一方法的功能,或者运行某个应用并输入数据来检查它的行为。 -
真正不同的地方在于,自动化 测试是由某个系统帮你自动完成的。当你创建好了一系列测试,每次修改应用代码后,就可以自动检查出修改后的代码是否还像你曾经预期的那样正常工作。你不需要花费大量时间来进行手动测试。
为什么你需要写测试
-
但是,为什么需要测试呢?又为什么是现在呢?
-
你可能觉得学 Python/Django 对你来说已经很满足了,再学一些新东西的话看起来有点负担过重并且没什么必要。毕竟,我们的投票应用看起来已经完美工作了。写一些自动测试并不能让它工作的更好。如果写一个投票应用是你想用 Django 完成的唯一工作,那你确实没必要学写测试。但是如果你还想写更复杂的项目,现在就是学习测试写法的最好时机了。
-
测试将节约你的时间
在某种程度上,能够「判断出代码是否正常工作」的测试,就称得上是个令人满意的了。在更复杂的应用程序中,组件之间可能会有数十个复杂的交互。
对其中某一组件的改变,也有可能会造成意想不到的结果。判断「代码是否正常工作」意味着你需要用大量的数据来完整的测试全部代码的功能,以确保你的小修改没有对应用整体造成破坏——这太费时间了。
尤其是当你发现自动化测试能在几秒钟之内帮你完成这件事时,就更会觉得手动测试实在是太浪费时间了。当某人写出错误的代码时,自动化测试还能帮助你定位错误代码的位置。
有时候你会觉得,和富有创造性和生产力的业务代码比起来,编写枯燥的测试代码实在是太无聊了,特别是当你知道你的代码完全没有问题的时候。
然而,编写测试还是要比花费几个小时手动测试你的应用,或者为了找到某个小错误而胡乱翻看代码要有意义的多。
-
测试不仅能发现错误,而且能预防错误
「测试是开发的对立面」,这种思想是不对的。
如果没有测试,整个应用的行为意图会变得更加的不清晰。甚至当你在看自己写的代码时也是这样,有时候你需要仔细研读一段代码才能搞清楚它有什么用。
而测试的出现改变了这种情况。测试就好像是从内部仔细检查你的代码,当有些地方出错时,这些地方将会变得很显眼——就算你自己没有意识到那里写错了。
-
测试使你的代码更有吸引力
你也许遇到过这种情况:你编写了一个绝赞的软件,但是其他开发者看都不看它一眼,因为它缺少测试。没有测试的代码不值得信任。 Django 最初开发者之一的 Jacob Kaplan-Moss 说过:“项目规划时没有包含测试是不科学的。”
其他的开发者希望在正式使用你的代码前看到它通过了测试,这是你需要写测试的另一个重要原因。
-
测试有利于团队协作
前面的几点都是从单人开发的角度来说的。复杂的应用可能由团队维护。测试的存在保证了协作者不会不小心破坏了了你的代码(也保证你不会不小心弄坏他们的)。如果你想作为一个 Django 程序员谋生的话,你必须擅长编写测试!
5.2 基础测试策略
-
有好几种不同的方法可以写测试。
一些开发者遵循 “测试驱动” 的开发原则,他们在写代码之前先写测试。这种方法看起来有点反直觉,但事实上,这和大多数人日常的做法是相吻合的。我们会先描述一个问题,然后写代码来解决它。「测试驱动」的开发方法只是将问题的描述抽象为了 Python 的测试样例。
-
更普遍的情况是,一个刚接触自动化测试的新手更倾向于先写代码,然后再写测试。虽然提前写测试可能更好,但是晚点写起码也比没有强。
有时候很难决定从哪里开始下手写测试。如果你才写了几千行 Python 代码,选择从哪里开始写测试确实不怎么简单。如果是这种情况,那么在你下次修改代码(比如加新功能,或者修复 Bug)之前写个测试是比较合理且有效的。
-
所以,我们现在就开始写吧。
5.3 开始写我们的第一个测试
首先得有个 Bug
-
幸运的是,我们的
polls应用现在就有一个小 bug 需要被修复:我们的要求是如果 Question 是在一天之内发布的,
Question.was_published_recently()方法将会返回True,然而现在这个方法在
Question的pub_date字段比当前时间还晚时也会返回 True(这是个 Bug)。 -
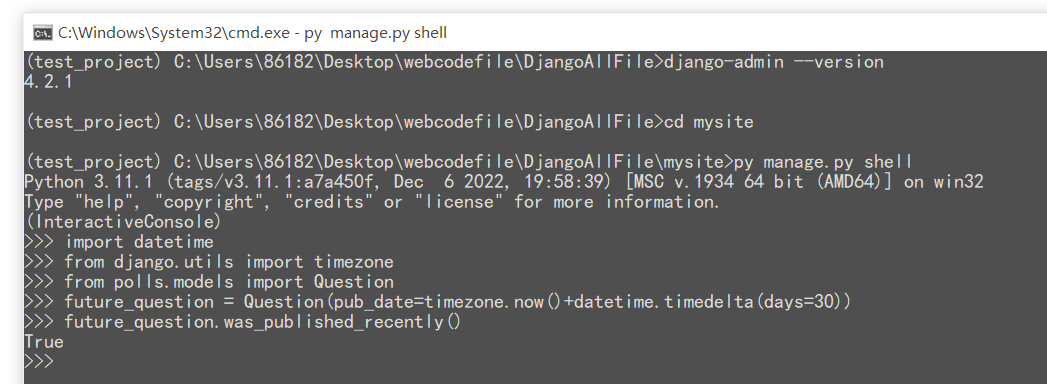
用djadmin:
shell命令确认一下这个方法的日期bug1
...\> py manage.py shell
1
2
3
4
5
6
7
8>> import datetime
>> from django.utils import timezone
>> from polls.models import Question
>> # create a Question instance with pub_date 30 days in the future
>> future_question = Question(pub_date=timezone.now() + datetime.timedelta(days=30))
>> # was it published recently?
>> future_question.was_published_recently()
True因为将来发生的是肯定不是最近发生的,所以代码明显是错误的。
创建一个测试来暴露这个 bug
-
我们刚刚在
shell里做的测试也就是自动化测试应该做的工作。所以我们来把它改写成自动化的吧。 -
按照惯例,Django 应用的测试应该写在应用的
tests.py文件里。测试系统会自动的在所有以tests开头的文件里寻找并执行测试代码。将下面的代码写入
polls应用里的tests.py文件内:polls/tests.py1
2
3
4
5
6
7
8
9
10
11
12
13
14
15
16
17import datetime
from django.test import TestCase
from django.utils import timezone
from .models import Question
class QuestionModelTests(TestCase):
def test_was_published_recently_with_future_question(self):
"""
was_published_recently() returns False for questions whose pub_date
is in the future.
"""
time = timezone.now() + datetime.timedelta(days=30)
future_question = Question(pub_date=time)
self.assertIs(future_question.was_published_recently(), False)我们创建了一个
django.test.TestCase的子类,并添加了一个方法,此方法创建一个pub_date时未来某天的Question实例。然后检查它的was_published_recently()方法的返回值——它 应该 是 False。
运行测试
-
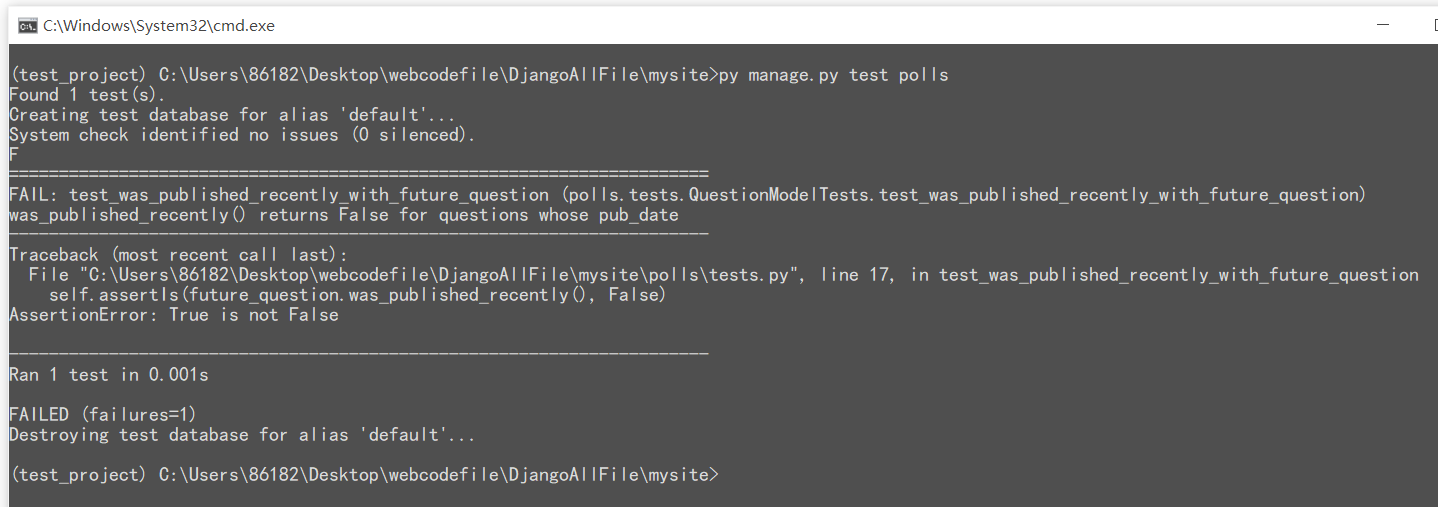
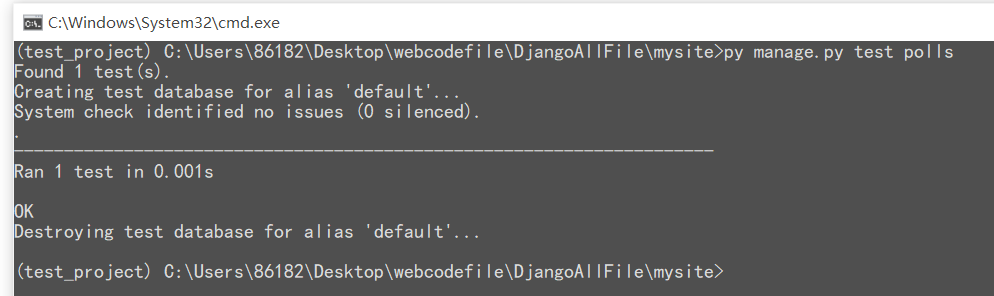
在终端中,我们通过输入以下代码运行测试:
1
...\> py manage.py test polls
测试情况:
不一样的错误?
若在此处你得到了一个
NameError错误,你可能漏了 第二步 中将datetime和timezone导入polls/model.py的步骤。复制这些语句,然后试着重新运行测试。发生了什么呢?以下是自动化测试的运行过程:
python manage.py test polls将会寻找polls应用里的测试代码- 它找到了
django.test.TestCase的一个子类 - 它创建一个特殊的数据库供测试使用
- 它在类中寻找测试方法——以
test开头的方法。 - 在
test_was_published_recently_with_future_question方法中,它创建了一个pub_date值为 30 天后的Question实例。 - 接着使用
assertls()方法,发现was_published_recently()返回了True,而我们期望它返回False。
测试系统通知我们哪些测试样例失败了,和造成测试失败的代码所在的行号。
修复这个 bug
-
我们早已知道,当
pub_date为未来某天时,Question.was_published_recently()应该返回False。我们修改
models.py里的方法,让它只在日期是过去式的时候才返回True:polls/models.py1
2
3def was_published_recently(self):
now = timezone.now()
return now - datetime.timedelta(days=1) <= self.pub_date <= now原来是:
1
2def was_published_recently(self):
return self.pub_date >= timezone.now() - datetime.timedelta(days=1) -
再次测试:
发现 bug 后,我们编写了能够暴露这个 bug 的自动化测试。在修复 bug 之后,我们的代码顺利的通过了测试。
将来,我们的应用可能会出现其他的问题,但是我们可以肯定的是,一定不会再次出现这个 bug,因为只要运行一遍测试,就会立刻收到警告。我们可以认为应用的这一小部分代码永远是安全的。
更全面的测试
-
我们已经搞定一小部分了,现在可以考虑全面的测试
was_published_recently()这个方法以确定它的安全性,然后就可以把这个方法稳定下来了。事实上,在修复一个 bug 时不小心引入另一个 bug 会是非常令人尴尬的。我们在上次写的类里再增加两个测试,来更全面的测试这个方法:
polls/test.py1
2
3
4
5
6
7
8
9
10
11
12
13
14
15
16
17
18def test_was_published_recently_with_old_question(self):
"""
was_published_recently() returns False for questions whose pub_date
is older than 1 day.
"""
time = timezone.now() - datetime.timedelta(days=1, seconds=1)
old_question = Question(pub_date=time)
self.assertIs(old_question.was_published_recently(), False)
def test_was_published_recently_with_recent_question(self):
"""
was_published_recently() returns True for questions whose pub_date
is within the last day.
"""
time = timezone.now() - datetime.timedelta(hours=23, minutes=59, seconds=59)
recent_question = Question(pub_date=time)
self.assertIs(recent_question.was_published_recently(), True)现在,我们有三个测试来确保
Question.was_published_recently()方法对于过去,最近,和将来的三种情况都返回正确的值。再次申明,尽管
polls现在是个小型的应用,但是无论它以后变得到多么复杂,无论他和其他代码如何交互,我们可以在一定程度上保证我们为之编写测试的方法将按照预期的方式运行。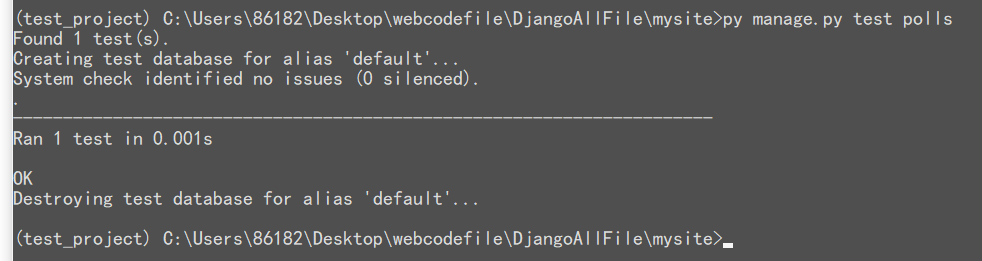
5.4 测试视图
我们的投票应用对所有问题都一视同仁:它将会发布所有的问题,也包括那些
pub_date字段值是未来的问题。我们应该改善这一点。如果
pub_date设置为未来某天,这应该被解释为这个问题将在所填写的时间点才被发布,而在之前是不可见的。
针对视图的测试
-
为了修复上述 bug ,我们这次先编写测试,然后再去改代码。事实上,这是一个「测试驱动」开发模式的实例,但其实这两者的顺序不太重要。
-
在我们的第一个测试中,我们关注代码的内部行为。我们通过模拟用户使用浏览器访问被测试的应用来检查代码行为是否符合预期。
在我们动手之前,先看看需要用到的工具们。
Django 测试工具之 Client
-
Django 提供了一个供测试使用的
Client来模拟用户和视图层代码的交互。我们能在tests.py甚至是shell中使用它。我们依照惯例从
shell开始,首先我们要做一些在tests.py里不是必须的准备工作。-
第一步是在
shell中配置测试环境:1
...\> py manage.py shell
1
2>> from django.test.utils import setup_test_environment
>> setup_test_environment()setup_test_environment()安装了一个模板渲染器,这将使我们能够检查响应上的一些额外属性,如
response.context,否则将无法使用此功能。请注意,这个方法 不会 建立一个测试数据库,所以下面的内容将针对现有的数据库运行,输出结果可能略有不同,这取决于你已经创建了哪些问题。如果你在
settings.py中的TIME_ZONE不正确,你可能会得到意外的结果。如果你不记得之前的配置,请在继续之前检查。准备:
1
2
3>> from django.test import Client
>> # create an instance of the client for our use
>> client = Client()让client 开始工作:
1
2
3
4
5
6
7
8
9
10
11
12
13
14
15
16
17
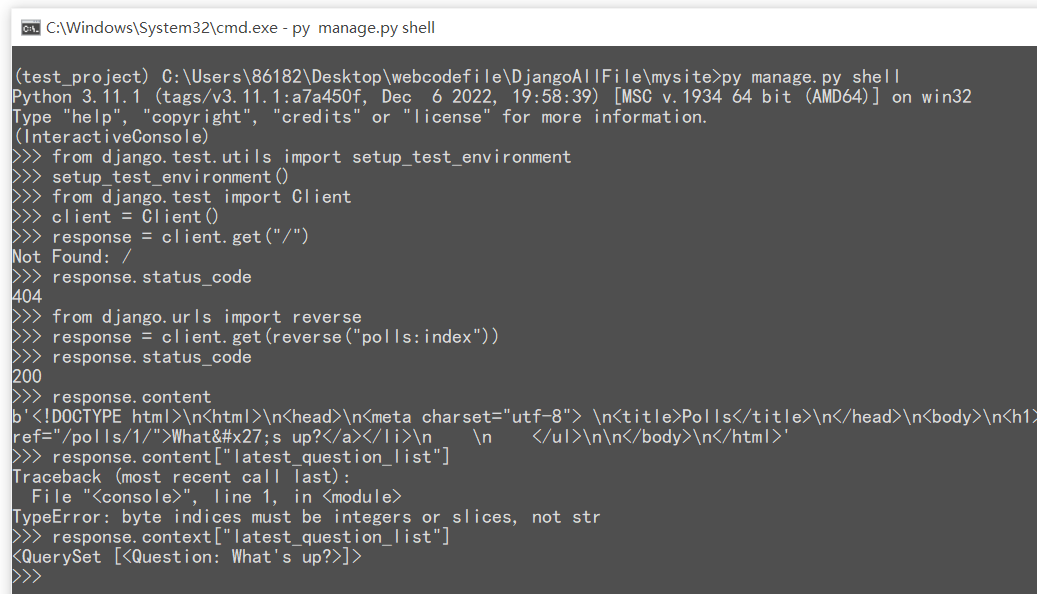
18>> # get a response from '/'
>> response = client.get("/")
Not Found: /
>> # we should expect a 404 from that address; if you instead see an
>> # "Invalid HTTP_HOST header" error and a 400 response, you probably
>> # omitted the setup_test_environment() call described earlier.
>> response.status_code
404
>> # on the other hand we should expect to find something at '/polls/'
>> # we'll use 'reverse()' rather than a hardcoded URL
>> from django.urls import reverse
>> response = client.get(reverse("polls:index"))
>> response.status_code
200
>> response.content
b'\n <ul>\n \n <li><a href="/polls/1/">What's up?</a></li>\n \n </ul>\n\n'
>> response.context["latest_question_list"]
<QuerySet [<Question: What's up?>]>我的测试效果:
-
改善视图代码
-
现在的投票列表会显示将来的投票(
pub_date值是未来的某天)。我们来修复这个问题。在 教程的第 4 部分里,我们介绍了基于
ListView的视图类:polls/views.py1
2
3
4
5
6
7class IndexView(generic.ListView):
template_name = "polls/index.html"
context_object_name = "latest_question_list"
def get_queryset(self):
"""Return the last five published questions."""
return Question.objects.order_by("-pub_date")[:5]我们需要改进
get_queryset()方法,让他它能通过将 Question 的 pub_data 属性与timezone.now()相比较来判断是否应该显示此 Question。首先我们需要一行 import 语句,然后我们把get_queryset方法改写成下面这样:polls/views.py1
2
3
4
5
6
7
8from django.utils import timezone
def get_queryset(self):
"""
Return the last five published questions (not including those set to be
published in the future).
"""
return Question.objects.filter(pub_date__lte=timezone.now()).order_by("-pub_date")[:5]
测试新视图
-
启动服务器、在浏览器中载入站点、创建一些发布时间在过去和将来的
Questions,然后检验只有已经发布的Questions会展示出来,现在你可以对自己感到满意了。你不想每次修改可能与这相关的代码时都重复这样做 —— 所以让我们基于以上shell会话中的内容,再编写一个测试。将下面的代码添加到
polls/tests.py:(我们写一个公用的快捷函数用于创建投票问题,再为视图创建一个测试类:)1
2
3
4
5
6
7
8
9
10
11
12
13
14
15
16
17
18
19
20
21
22
23
24
25
26
27
28
29
30
31
32
33
34
35
36
37
38
39
40
41
42
43
44
45
46
47
48
49
50
51
52
53
54
55
56
57
58
59
60
61
62
63
64
65
66
67
68from django.urls import reverse
def create_question(question_text, days):
"""
Create a question with the given `question_text` and published the
given number of `days` offset to now (negative for questions published
in the past, positive for questions that have yet to be published).
"""
time = timezone.now() + datetime.timedelta(days=days)
return Question.objects.create(question_text=question_text, pub_date=time)
class QuestionIndexViewTests(TestCase):
def test_no_questions(self):
"""
If no questions exist, an appropriate message is displayed.
"""
response = self.client.get(reverse("polls:index"))
self.assertEqual(response.status_code, 200)
self.assertContains(response, "No polls are available.")
self.assertQuerySetEqual(response.context["latest_question_list"], [])
def test_past_question(self):
"""
Questions with a pub_date in the past are displayed on the
index page.
"""
question = create_question(question_text="Past question.", days=-30)
response = self.client.get(reverse("polls:index"))
self.assertQuerySetEqual(
response.context["latest_question_list"],
[question],
)
def test_future_question(self):
"""
Questions with a pub_date in the future aren't displayed on
the index page.
"""
create_question(question_text="Future question.", days=30)
response = self.client.get(reverse("polls:index"))
self.assertContains(response, "No polls are available.")
self.assertQuerySetEqual(response.context["latest_question_list"], [])
def test_future_question_and_past_question(self):
"""
Even if both past and future questions exist, only past questions
are displayed.
"""
question = create_question(question_text="Past question.", days=-30)
create_question(question_text="Future question.", days=30)
response = self.client.get(reverse("polls:index"))
self.assertQuerySetEqual(
response.context["latest_question_list"],
[question],
)
def test_two_past_questions(self):
"""
The questions index page may display multiple questions.
"""
question1 = create_question(question_text="Past question 1.", days=-30)
question2 = create_question(question_text="Past question 2.", days=-5)
response = self.client.get(reverse("polls:index"))
self.assertQuerySetEqual(
response.context["latest_question_list"],
[question2, question1],
)让我们更详细地看下以上这些内容。
首先是一个快捷函数
create_question,它封装了创建投票的流程,减少了重复代码。在
test_past_question方法中,我们创建了一个投票并检查它是否出现在列表中。在
test_future_question中,我们创建pub_date在未来某天的投票。数据库会在每次调用测试方法前被重置,所以第一个投票已经没了,所以主页中应该没有任何投票。剩下的那些也都差不多。实际上,测试就是假装一些管理员的输入,然后通过用户端的表现是否符合预期来判断新加入的改变是否破坏了原有的系统状态。
测试 DetailView
-
我们的工作似乎已经很完美了?不,还有一个问题:就算在发布日期时未来的那些投票不会在目录页 index 里出现,但是如果用户知道或者猜到正确的 URL ,还是可以访问到它们。所以我们得在
DetailView里增加一些约束:polls/views.py1
2
3
4
5
6
7
8class DetailView(generic.DetailView):
...
def get_queryset(self):
"""
Excludes any questions that aren't published yet.
"""
return Question.objects.filter(pub_date__lte=timezone.now()) -
然后,我们应该增加一些测试来检验
pub_date在过去的Question能够被显示出来,而pub_date在未来的则不可以:polls/test.py1
2
3
4
5
6
7
8
9
10
11
12
13
14
15
16
17
18
19
20class QuestionDetailViewTests(TestCase):
def test_future_question(self):
"""
The detail view of a question with a pub_date in the future
returns a 404 not found.
"""
future_question = create_question(question_text="Future question.", days=5)
url = reverse("polls:detail", args=(future_question.id,))
response = self.client.get(url)
self.assertEqual(response.status_code, 404)
def test_past_question(self):
"""
The detail view of a question with a pub_date in the past
displays the question's text.
"""
past_question = create_question(question_text="Past Question.", days=-5)
url = reverse("polls:detail", args=(past_question.id,))
response = self.client.get(url)
self.assertContains(response, past_question.question_text) -
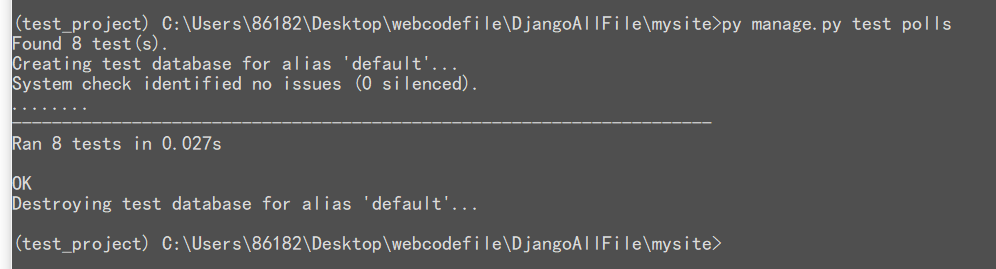
测试
我的测试结果:
更多的测试思路
-
我们应该给
ResultsView也增加一个类似的get_queryset方法,并且为它创建测试。这和我们之前干的差不多,事实上,基本就是重复一遍。 -
我们还可以从各个方面改进投票应用,但是测试会一直伴随我们。比方说,在目录页上显示一个没有选项
Choices的投票问题就没什么意义。我们可以检查并排除这样的投票题。测试可以创建一个没有选项的投票,然后检查它是否被显示在目录上。当然也要创建一个有选项的投票,然后确认它确实被显示了。恩,也许你想让管理员能在目录上看见未被发布的那些投票,但是普通用户看不到。不管怎么说,如果你想要增加一个新功能,那么同时一定要为它编写测试。不过你是先写代码还是先写测试那就随你了。
-
在未来的某个时刻,你一定会去查看测试代码,然后开始怀疑:「这么多的测试不会使代码越来越复杂吗?」。别着急,我们马上就会谈到这一点。
5.5 当需要测试的时候,测试用例越多越好
-
貌似我们的测试多的快要失去控制了。按照这样发展下去,测试代码就要变得比应用的实际代码还要多了。而且测试代码大多都是重复且不优雅的,特别是在和业务代码比起来的时候,这种感觉更加明显。
但是这没关系! 就让测试代码继续肆意增长吧。大部分情况下,你写完一个测试之后就可以忘掉它了。在你继续开发的过程中,它会一直默默无闻地为你做贡献的。
-
但有时测试也需要更新。想象一下如果我们修改了视图,只显示有选项的那些投票,那么只前写的很多测试就都会失败。但这也明确地告诉了我们哪些测试需要被更新,所以测试也会测试自己。
最坏的情况是,当你继续开发的时候,发现之前的一些测试现在看来是多余的。但是这也不是什么问题,多做些测试也 不错。
如果你对测试有个整体规划,那么它们就几乎不会变得混乱。下面有几条好的建议:
- 对于每个模型和视图都建立单独的
TestClass - 每个测试方法只测试一个功能
- 给每个测试方法起个能描述其功能的名字
- 对于每个模型和视图都建立单独的
5.6 深入代码测试
-
在本教程中,我们仅仅是了解了测试的基础知识。你能做的还有很多,而且世界上有很多有用的工具来帮你完成这些有意义的事。
举个例子,在上述的测试中,我们已经从代码逻辑和视图响应的角度检查了应用的输出,现在你可以从一个更加 “in-browser” 的角度来检查最终渲染出的 HTML 是否符合预期,使用 Selenium 可以很轻松的完成这件事。这个工具不仅可以测试 Django 框架里的代码,还可以检查其他部分,比如说你的 JavaScript。它假装成是一个正在和你站点进行交互的浏览器,就好像有个真人在访问网站一样!Django 它提供了
LiveServerTestCase来和 Selenium 这样的工具进行交互。 -
如果你在开发一个很复杂的应用的话,
你也许想在每次提交代码时自动运行测试,也就是我们所说的持续集成 continuous integration,
这样就能实现质量控制的自动化,起码是部分自动化。
-
一个找出代码中未被测试部分的方法是检查代码覆盖率。它有助于找出代码中的薄弱部分和无用部分。如果你无法测试一段代码,通常说明这段代码需要被重构或者删除。想知道代码覆盖率和无用代码的详细信息,查看文档 集成 coverage.py 获取详细信息。
文档 Django 中的测试 里有关于测试的更多信息。
5.7 接下来要做什么?
如果你想深入了解测试,就去看 Django 中的测试 。
当你已经比较熟悉测试 Django 视图的方法后,就可以继续阅读 教程第 6 部分 ,学习静态文件管理的相关知识。
 微信支付
微信支付 支付宝
支付宝